
|
|---|
|
|
|---|
|
|---|
| ⦁ Introduction |
| Getting Started | |
|
Before we dive into the first lesson, lets look at how to find your way around in Photoshop. For most of you this is pretty basic stuff but it never
fails, when I don't go over this with my students assuming everyone already knows this, someone will be lost.
So... lets look at how palettes or windows work and where to find them. |
|
|
Menu Bar and Tool settings | |
 | |
|
The image here shows the uppermost part of your screen when Photoshop is running. Where you see "FILE EDIT" and so forth, that is called
the "menu bar." Most computer programs have one so you are probably familiar with how it works. Hold your mouse button down over an
item and a pull down menu appears below. Scroll down to a given command and release the mouse. That command blinks for a second then
carries out that function.
Some commands may have several sub menus so don't be too quick to release the mouse. For example, in Photoshop go to EDIT/TRANSFORM and take a look. Notice there is a small black arrow by TRANSFORM. It means there will be more menus to choose from.
Also notice by many of the menu commands, there may be a set of key commands off to the right. These are keyboard shortcuts.
Directly below the menu bar, and only in versions before 6, is the tool settings bar. In this particular example I have my airbrush tool selected so the
bar automatically shows me how the airbrush is set.
| |
|
Windows or Paletts and where to find them. | |
|
Below is a screen shot of several different palettes, or windows
(either term is acceptable) open at once. Photoshop has many different palettes probably more than you will need open at any given time. To locate one, go to your menu bar under WINDOWS. All of them can be found there. (Here is a little tip. If you have so many palettes open that you can't locate one, say, layers. Go to WINDOWS/HIDE LAYERS and then go back to WINDOWS/SHOW LAYERS and it will pop up on top where you can see it.) | |
 | |
|
Windows or Paletts moving and sizing them. | |
| Pull out any window. Use the diagram here to locate the features of a window.
|
 |
|
Windows or Paletts more than one in a package. | |
|
Finally, because Photoshop uses so many different palettes, to save space several may be bunched together at a time.
In this example, I have only two together. LAYERS, and SWATCHES. Note the two tabs in the upper portion of the window. I can choose to leave
them together and simply click on the tab I want to use to bring that one forward.
However, sometimes I may want both palettes visible at the same time. To do this, simply click on one of the tabs and drag it out to the side. You can put it back the same way. Just drag it back in. Look at these two examples. One shows the palettes together, and the other shows them separated. When you go to your menu bar under WINDOWS and look in there, you can tell which palettes are grouped together. Groups will be separated with a thin line. You can regroup these any way you like. If you open three separate palettes and drag the tabs into one, that will show up as a group. Become familiar with how to move your windows, or palettes around. You'll be doing a lot of that with Photoshop. | 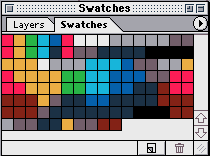 |
 | |
|---|---|
|
OK enough of the basics of windows here.
I'll go into more detail of each windows functions as they come up. Lets go have some fun now. Onto the first lesson. |
|